Showing posts with label salesforce. Show all posts

Thursday, 27 June 2013

Book Review: Salesforce CRM Admin Cookbook


Recently, I have been reading the "Salesforce CRM Admin Cookbook" by Paul Goodey. The book contains a selection of guides (or recipes) for solving common problems and adding additional functionality to your Salesforce org. Here are my thoughts....

Salesforce CRM Admin Cookbook


The book itself provides simple and effective remedies to many common problems I have experienced during my time as a Salesforce developer/administrator. The solutions themselves are presented in an impressively straightforward manner. There is no unnecessary waffle or fluff, just straight to the point step by step instructions on how to practically and quickly solve common bug bears and improve your org for your users.

The highlight of the book for me was a recipe that dealt with extending the standard input date calendar range. This is something that has always bugged me, I can't speak for the majority of company's out there, but most of my contacts were born before 2012 :) . The proposed solution is simple and maintains consistency across the whole org. Other personal highlights include validation rules for verifying UK and US postcodes, a step by step guide to email integration and creating buttons on related lists to carry out actions on multiple records simultaneously.

In my view the best way to get the most out of the book is to read through and try out a new recipe each day, rather than trying to find a solution for a situation when it arises. The individual solutions do not take a lot of time to implement, and will give you a definite appreciation of the tools available to you as a SF admin.

A slight drawback of some of the recipes is a dependency on the current Salesforce styling and specific component id names. However, Paul Goodey, the author, makes you fully aware of this, and the nature of the solutions means that if the standard Salesforce page components were ever to change, administrators could update the content to match the new HTML standard. What is important about the solutions described is not necessarily the source code or specific problem, but rather the tools, approaches and techniques used, which can be adapted to a wide range of other scenarios.

In summary, if you are a Salesforce administrator looking to explore some of the advanced features of the platform, or want to know how to alter some of the standard appearance and functionality of your org to suit your users needs, then the Salesforce CRM Admin Cookbook is a must have. I challenge any admin to read this book without having a "Oh, that's how you can do that!" moment or six.

The book can be purchased online at Amazon

Saturday, 8 September 2012

Making rejection comments mandatory in approval processes

When I was recently asked to set up an approval process on a custom object in a application, I noticed that it was possible to reject an approval request without having to populate the comment field.

This didn't seem to make much sense to me, if an approval is rejected, it is likely that the requesting user will want to know why this is the case. I was surprised to find that there was no setup option to configure the process this way. 

I found that it is possible to make comments mandatory through adding a custom field, some extra steps to your approval process, and an apex trigger for the object. Here is a step by step guide if you want to do the same:

1) Create a new picklist custom field for your object. Set the label as "Approval Status". Add three picklist values ("Pending", "Approved" & "Rejected"). Make this field visible and editable by System Administrators only.


2) Navigate to the field updates menu (Setup --> App Setup --> Create --> Workflows & Approvals --> Field Updates) and create a new field update worfkflow action. Set the name of the new action to "Approval Status Pending" and unique name to "Approval_Status_Pending" and object to the object you added the custom field to. Then select the Approval Status field from the resulting drop down. In the new field value options, select "A specific value" then pick "Pending" status.


3) Repeat step 2 for the "Approved" and "Rejected" picklist values, creating field updates called "Approval Status Approved" and "Approval Status Rejected" respectively.


4) Navigate to your approval process. In "Initial Submission Actions" add the "Approval Status Pending" field update action. Add "Approval Status Approval" update to "Final Approval Actions" and "Approval Status Rejection" to "Final Rejection Actions".


5) Create a new "RequireRejectionComment" before update Apex trigger on your object with the following body (substituting "Invoice_Statement__c" for your object API name).

trigger RequireRejectionComment on Invoice_Statement__c (before update) 
{

  Map<Id, Invoice_Statement__c> rejectedStatements 
             = new Map<Id, Invoice_Statement__c>{};

  for(Invoice_Statement__c inv: trigger.new)
  {
    /* 
      Get the old object record, and check if the approval status 
      field has been updated to rejected. If so, put it in a map 
      so we only have to use 1 SOQL query to do all checks.
    */
    Invoice_Statement__c oldInv = System.Trigger.oldMap.get(inv.Id);

    if (oldInv.Approval_Status__c != 'Rejected' 
     && inv.Approval_Status__c == 'Rejected')
    { 
      rejectedStatements.put(inv.Id, inv);  
    }
  }
   
  if (!rejectedStatements.isEmpty())  
  {
    // UPDATE 2/1/2014: Get the most recent approval process instance for the object.
    // If there are some approvals to be reviewed for approval, then
    // get the most recent process instance for each object.
    List<Id> processInstanceIds = new List<Id>{};
    
    for (Invoice_Statement__c invs : [SELECT (SELECT ID
                                              FROM ProcessInstances
                                              ORDER BY CreatedDate DESC
                                              LIMIT 1)
                                      FROM Invoice_Statement__c
                                      WHERE ID IN :rejectedStatements.keySet()])
    {
        processInstanceIds.add(invs.ProcessInstances[0].Id);
    }
      
    // Now that we have the most recent process instances, we can check
    // the most recent process steps for comments.  
    for (ProcessInstance pi : [SELECT TargetObjectId,
                                   (SELECT Id, StepStatus, Comments 
                                    FROM Steps
                                    ORDER BY CreatedDate DESC
                                    LIMIT 1 )
                               FROM ProcessInstance
                               WHERE Id IN :processInstanceIds
                               ORDER BY CreatedDate DESC])   
    {                   
      if ((pi.Steps[0].Comments == null || 
           pi.Steps[0].Comments.trim().length() == 0))
      {
        rejectedStatements.get(pi.TargetObjectId).addError(
          'Operation Cancelled: Please provide a rejection reason!');
      }
    }  
  }
}

The trigger captures any update where the approval status is changed to "rejected" from another value. The field should have this value if it gets rejected, thanks to the way we set up the approval process. 

If the field has been updated in this way, a SOQL query is used to analyse the last created rejection approval history object related to the trigger object. If the comment is empty, the update gets stopped, and an error message is added to the screen.

Here are some screen shots of rejecting a request in chatter, and the resulting error message:


So there you have it, now all your rejections must have a comment, otherwise the operation is reversed! Because the rejection logic is handled in a trigger, this approach works for rejections through the standard pages, in chatter, and in Apex code.

Update 30/12/2013 : here is a sample test method for the trigger, hope it helps, remember to adapt it for your own implementation
/*
    A sample test class for the Require Rejection Comment trigger
*/
@isTest
public class RequireRejectionCommentTest
{
    /*
        For this first test, create an object for approval, then
        simulate rejeting the approval with an added comment for explanation.
        
        The rejection should be processed normally without being interrupted.
    */
    private static testmethod void testRejectionWithComment()
    {
        // Generate sample work item using utility method.
        Id testWorkItemId = generateAndSubmitObject();
        
        // Reject the submitted request, providing a comment.
        Approval.ProcessWorkitemRequest testRej = new Approval.ProcessWorkitemRequest();
        testRej.setComments('Rejecting request with a comment.');
        testRej.setAction  ('Reject');
        testRej.setWorkitemId(testWorkItemId);
    
        Test.startTest();        
            // Process the rejection
            Approval.ProcessResult testRejResult =  Approval.process(testRej);
        Test.stopTest();
        
        // Verify the rejection results
        System.assert(testRejResult.isSuccess(), 'Rejections that include comments should be permitted');
        System.assertEquals('Rejected', testRejResult.getInstanceStatus(), 
          'Rejections that include comments should be successful and instance status should be Rejected');
    }
    
    /*
        For this test, create an object for approval, then reject the request, mark the approval status as pending, then
        without a comment explaining why. The rejection should be halted, and
        and an apex page message should be provided to the user.
    */
    private static testmethod void testRejectionWithoutComment()
    {
        // Generate sample work item using utility method.
        Id testWorkItemId = generateAndSubmitObject();
        
        // Reject the submitted request, without providing a comment.
        Approval.ProcessWorkitemRequest testRej = new Approval.ProcessWorkitemRequest();
        testRej.setComments('');
        testRej.setAction  ('Reject');      
        testRej.setWorkitemId(testWorkItemId);
    
        Test.startTest();        
            // Attempt to process the rejection
            try
            {
                Approval.ProcessResult testRejResult =  Approval.process(testRej);
                system.assert(false, 'A rejection with no comment should cause an exception');
            }
            catch(DMLException e)
            {
                system.assertEquals('Operation Cancelled: Please provide a rejection reason!', 
                                    e.getDmlMessage(0), 
                  'error message should be Operation Cancelled: Please provide a rejection reason!'); 
            }
        Test.stopTest();
    }
    
    /*
        When an approval is approved instead of rejected, a comment is not required, 
        mark the approval status as pending, then ensure that this functionality still holds together.
    */
    private static testmethod void testApprovalWithoutComment()
    {
        // Generate sample work item using utility method.
        Id testWorkItemId = generateAndSubmitObject();
        
        // approve the submitted request, without providing a comment.
        Approval.ProcessWorkitemRequest testApp = new Approval.ProcessWorkitemRequest();
        testApp.setComments ('');
        testApp.setAction   ('Approve');
        testApp.setWorkitemId(testWorkItemId);
    
        Test.startTest();        
            // Process the approval
            Approval.ProcessResult testAppResult =  Approval.process(testApp);
        Test.stopTest();
        
        // Verify the approval results
        System.assert(testAppResult.isSuccess(), 
                     'Approvals that do not include comments should still be permitted');
        System.assertEquals('Approved', testAppResult.getInstanceStatus(), 
           'All approvals should be successful and result in an instance status of Approved');
    }
    
    /*
        Put many objects through the approval process, some rejected, some approved,
        some with comments, some without. Only rejctions without comments should be
        prevented from being saved.
    */
    private static testmethod void testBatchRejctions()
    {
        List<Invoice_Statement__c> testBatchIS = new List<Invoice_Statement__c>{};
        for (Integer i = 0; i < 200; i++)
        {
            testBatchIS.add(new Invoice_Statement__c());
        }   
           
        insert testBatchIS;
        
        List<Approval.ProcessSubmitRequest> testReqs = 
                         new List<Approval.ProcessSubmitRequest>{}; 
        for(Invoice_Statement__c testinv : testBatchIS)
        {
            Approval.ProcessSubmitRequest testReq = new Approval.ProcessSubmitRequest();
            testReq.setObjectId(testinv.Id);
            testReqs.add(testReq);
        }
        
        List<Approval.ProcessResult> reqResults = Approval.process(testReqs);
        
        for (Approval.ProcessResult reqResult : reqResults)
        {
            System.assert(reqResult.isSuccess(), 
                          'Unable to submit new batch invoice statement record for approval');
        }
        
        List<Approval.ProcessWorkitemRequest> testAppRejs 
                                                  = new List<Approval.ProcessWorkitemRequest>{};
        
        for (Integer i = 0; i < 50 ; i++)
        {
            Approval.ProcessWorkitemRequest testRejWithComment = new Approval.ProcessWorkitemRequest();
            testRejWithComment.setComments  ('Rejecting request with a comment.');
            testRejWithComment.setAction    ('Reject');
            testRejWithComment.setWorkitemId(reqResults[i*4].getNewWorkitemIds()[0]);
            
            testAppRejs.add(testRejWithComment);
            
            Approval.ProcessWorkitemRequest testRejWithoutComment = new Approval.ProcessWorkitemRequest();
            testRejWithoutComment.setAction    ('Reject');
            testRejWithoutComment.setWorkitemId(reqResults[(i*4)+1].getNewWorkitemIds()[0]);
            
            testAppRejs.add(testRejWithoutComment);
            
            Approval.ProcessWorkitemRequest testAppWithComment = new Approval.ProcessWorkitemRequest();
            testAppWithComment.setComments  ('Approving request with a comment.');
            testAppWithComment.setAction    ('Approve');
            testAppWithComment.setWorkitemId(reqResults[(i*4)+2].getNewWorkitemIds()[0]);
            
            testAppRejs.add(testAppWithComment);
            
            Approval.ProcessWorkitemRequest testAppWithoutComment = new Approval.ProcessWorkitemRequest();
            testAppWithoutComment.setAction    ('Approve');
            testAppWithoutComment.setWorkitemId(reqResults[(i*4)+3].getNewWorkitemIds()[0]);
            
            testAppRejs.add(testAppWithoutComment);            
        }
            
        Test.startTest();        
            // Process the approvals and rejections
            try
            {
                List<Approval.ProcessResult> testAppRejResults =  Approval.process(testAppRejs);
                system.assert(false, 'Any rejections without comments should cause an exception');
            }
            catch(DMLException e)
            {
                system.assertEquals(50, e.getNumDml());
                
                for(Integer i = 0; i < 50 ; i++)
                {
                    system.assertEquals((i*4) + 1, e.getDmlIndex(i));
                    system.assertEquals('Operation Cancelled: Please provide a rejection reason!', 
                                        e.getDmlMessage(i));
                }
            }    
        Test.stopTest();
    }
    
    /*
        Utility method for creating single object, and submitting for approval.
        
        The method should return the Id of the work item generated as a result of the submission.
    */
    private static Id generateAndSubmitObject()
    {
        // Create a sample invoice statement object and then submit it for approval.
        Invoice_Statement__c testIS = new Invoice_Statement__c();
        insert testIS;
        
        Approval.ProcessSubmitRequest testReq = new Approval.ProcessSubmitRequest();
        testReq.setObjectId(testIS.Id);
        Approval.ProcessResult reqResult = Approval.process(testReq);
        
        System.assert(reqResult.isSuccess(),'Unable to submit new invoice statement record for approval');
        
        return reqResult.getNewWorkitemIds()[0];
    }
}

Sunday, 6 November 2011

How to create a "Past 24 hours" flexible report

Sometimes as a Force.com developer you can be asked to complete tasks that on the surface seem simple, but can quickly prove beyond difficult due to the current limitations of the platform. Recently a client asked if it was possible to construct a report that listed all the Accounts that had been created in the past twenty four hours. They were looking to run this report at the end of their business day, which runs between 3pm one day to 3pm the following day.

Given this report criteria, lets take a look at the options available at a day level in reporting for a datetime field like created time:


As you can see, we are limited to specific datetime ranges (Current day, yesterday, this week, last FY etc.). While there are standard criteria values relating to the current day (00:00:00 to 23:59:59), there are no entries that relate to the current time in the system. Of course this time range can be defined manually in the "From" and "To" entry fields when using the "Custom" range option, but this means the report will only work for that specific time frame, essentially meaning a new unique report has to be created each day.

At this point, my options seemed to be:
  1. Instruct the client to change the report criteria daily and run the report manually at 3pm (unreliable and time consuming).
  2. Try to convince the client to change their business practice hours to fit the strict day by day Salesforce model (and find myself in an Force.com developer shaped hole in the wall).
Not wanting to propose either of these approaches, I pressed on, determined to find another way. I came to the realisation that while it is not possible to create a 24 hours report directly through manipulating criteria in the report builder, a custom formula field can be created on the account object that can identify if the created date field date/time value is within the last the past 24 hours. A report can then be created where results are filtered based on the value of this formula field.

To do this, first create a new text formula field on the Account object, giving it a suitable name such as "Account created past 24 hours". In the formula entry panel, enter the following formula:

IF ( NOW() - CreatedDate < 1 ,"TRUE", "FALSE" )

In formula fields, if you subtract one date/time from another, the result is returned in the form of a number. This number is the amount of days between the two expressed as a decimal (1 = 1 day, 3.5 = 3 days 12 hrs etc). The formula above calculates the decimal time difference between the current system time and the date and time the account object was created. If this value is less than or equal to 1, it follows that the account was created in the last 24 hours.

Formula fields cannot be defined as returning a simple boolean value, so instead the formula is set as a text field and the logic condition is encapsulated inside an if statement. If the condition is true (account created in past 24 hours) a TRUE text value will be returned, if the condition is false, FALSE will be returned. If preferred, this could be simplified to Y and N, or even a numerical formula field with values of 1 and 0.

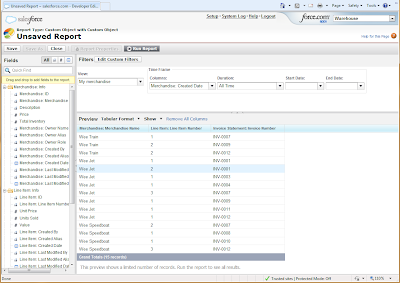
After creating the formula field, include the field and the created date in an account view to ensure the field behaves as intended. The following screenshot was created today. Don't be fooled by the appearance of the created date field. Although it only displays a date string with no time, it is a date/time field. To see the date time value, simply click onto an account record and find the field on the account detail page.  


We can now leverage this formula field to create our past twenty four hours report. Simply create a new account report, and add a new filter where the value of our custom "Account created past 24 hours" formula field is equal to "TRUE". Make sure that the Range date criteria on the line above is set to "All Time"


Use the report builder to select all the detail fields you wish to include in the report, and save the new report.  Run the report, and you should see the details of all the accounts created in the past 24 hours. The client now has a report they can run at three o'clock that shows all the accounts created in the past 24 hours. Magic!


BUT!!!
This is still not an entirely suitable solution for our problem. The original request was for a report that could see the accounts that were created between 3pm on the current day and 3pm the previous day. If the client ran the report at any time other than exactly 3pm, the result would be skewed, and relevant account records could be potentially excluded from the report.

If this report were to be scheduled to be run every day at 3pm inside Salesforce, the same skewing would occur, as report scheduling simply indicates a preferred time. The following is extracted directly from Salesforce scheduling a report documentation
  • The report runs within 30 minutes of the time you select for Preferred Start Time. For example, if you select 2:00 PM as your preferred start time, the report runs any time in between 2:00 PM and 2:29 PM, depending on how many other reports are scheduled at that time.

The formula needs to be adapted to cope with this potential skewing, so the report can be scheduled to run correctly. Instead of just comparing the created date field to the value of the current system date time (NOW()), the current system time needs to be rounded to last whole hour. There is no method or function within formula fields that allows for the manipulation of date/time fields, so in order to accomplish this we need to transform the two date time variables into a numerical forms that can be manipulated.

As illustrated in the initial draft of the formula above, the result of subtracting one date time value from another is always returned in a numerical form. Comparable numerical values of our date time variables can therefore be created by subtracting a common early base date/time value from both values. Fortunately, Salesforce provides a suitable offset date/time out of the box. The System.OriginDateTime variable is a global Salesforce variable, and is a date/time representation of the turn of the 20th century (1900-01-01 00:00:00).

So to convert the current system date time into a numerical form, use the following inside a formula field:
NOW() - ($System.OriginDateTime)

and to convert the account created date to a similar comparable value:
CreatedDate - ($System.OriginDateTime)

However we are still not finished, we need to round the numerical representation of the current system time to the nearest hour. Remember that all numerical representations of date/time comparison values represent the number of days between the two time-stamps as a decimal. To convert this value to be in hours instead of days, simply multiply the decimal value by 24. The date/time value can now be rounded down to the nearest hour by using the FLOOR function on the decimal number. The excess minutes have now been removed. Divide the resultant rounded number by 24 to convert the value back into a value based on days, and it can now effectively be used in the comparisson formula.

The final formula looks like this:

IF ((FLOOR ((NOW() - ($System.OriginDateTime)) * 24) / 24)  - 
(CreatedDate - ($System.OriginDateTime)) < 1, "TRUE", "FALSE" )

If you update your formula field to the new value shown above, and then run the report again, you will see that it the cut off point for account created dates has now been rounded to the last hour. So it doesn't matter if you run the report at 3:00 pm, 3:01 pm, 3:30 pm or 3:59pm, the result will always be the same.

So now the client has a report they can run  that shows them the account records created in the last twenty four hours, that only varies by the hour, not the minutes. The report is scheduled so every day at some time between 3pm and 3:30pm they receive a direct email report of all accounts created in their last business day.

So there you have it, happy reporting! This was a task that seemed simple on the surface, but quickly became very complex. An effective solution has been created by using alternative thinking and manipulation of other native Salesforce utilities. I am a firm believer that although Salesforce does not always provide functionality as required straight out of the box, there is always another way to accomplish business goals with the suite of tools they provide.

A big plus point of this solution is that it opens to door to solve numerous report time criteria challenges. This date/time manipulation formula field could be applied to any salesforce date/time field, not just created date and not just on the account object. The formula can also be adjusted to different timeframe scenarios (previous 48 hrs, past ten minutes, an hour either side).

As a bonus tip if you ever have to use this method, there can be scenarios where you have to account for future time values. In the created date example, all values of the comparison field ,created date, were guaranteed to be in the past. If you had date/time values you wished to analyse that potentially had values in the future, you have to add an extra clause to account for the negative values, like so:

IF ( 
AND( 
Custom_DateTime_Field__c - ($System.OriginDateTime) >=
((FLOOR ((NOW() - ($System.OriginDateTime)) * 24) / 24) -1), 
Custom_DateTime_Field__c - ($System.OriginDateTime) <
(FLOOR ((NOW() - ($System.OriginDateTime)) * 24) / 24) 
), "TRUE", "FALSE" .
)

If you have any questions about the formula field, or how to define a formula field for a particular timespan or scenario, get in touch!

Thursday, 22 July 2010

Report Builder Developer Preview Webinar Feedback

Today I took part in the new Report Builder Webinar, which included a demonstration of the new builder tool Salesforce has created in response to users commenting that the existing wizard was clumsy and made making changes a very arduous process. In the past, creating a single report involved plodding through seven setup screens, which all have to be repeated if you want to make a single change, and there is no clue as to what the report will look like until all these preparation steps have been completed. The new tool is much more interactive, providing a single screen with an active preview of the report based on a small portion of your existing data. The report is refreshed every time you make a change, so you always have an exact idea of the reports end appearance.

The Report Builder is already available in all developer editions. To really appreciate the improvement, I had a go at creating a few simple reports using both the standard wizard and the new report builder. Using the new tool is a vast improvement and a lot more intuitive. I was able to add fields, change the order of fields, order data, group rows and impose date period restrictions on fields immediately using built in menus. The report builder can create reports for both standard and custom objects, and even pre-prepares standard report templates for custom objects based on their relationships with other Salesforce objects.

To access the report builder, click on the Reports tab (can be included in an app through setup if not there already), and then on the “Create Report With Report Builder” button. The “Create New Custom Report” button allows you to use the old report wizard.

The report builder will be rolled out to all editions in the Winter ’11 release later this year, so is not immediately available to create and manipulate reports in Salesforce applications. However, because the underlying metadata for reports is the same no matter which composer is used, you could potentially use developer accounts to create the reports using the new builder and then copy the metadata to your production application. For this to work you must ensure that the underlying object models between the developer copy and your production org are the same.

Thursday, 1 July 2010

Adding alphabetical lists in Salesforce PDFs

One of the better features of Salesforce and apex programming is the ability to generate Visualforce pages as PDFs by simply using the renderAs="pdf" attribute notation in the apex:page tag. However, recently when using this feature to generate a list of conditions, I noticed that whenever you define an apex datalist, or an ordered list in html that uses letters (a,b,c,d) as the markers for each element in the list, these are rendered in the PDF incorrectly.

Take the following example of a page and controller:

Page:
<apex:page showHeader="false" controller="LetterListController" standardStylesheets="false" sidebar="false">

<apex:dataList value="{!accounts}" type="a" var="account" id="theList" >
<apex:outputText value="{!account.name}"/>
</apex:dataList>

<ol type="a">
<li>First Item</li>
<li>Second Item</li>
<li>Third Item</li>
<li>Last Item</li>
</ol>

</apex:page>

Controller:
public class LetterListController {

List<Account> accounts;

public List<Account> getAccounts() {
if(accounts == null) accounts = [select name from account limit 10];
return accounts;
}
}


When the Letter List page is rendered in Salesforce, the following output appears-


Absolutely fine, but when we add the renderAs="pdf" attribute in the page tag definition, the PDF output is -


The apex datalist has been rendered as a list with blobs, while the html list has been changed to be ordered by numbers. This is quite frustrating, but the solution is simple. You can choose the bullet point class of a list using the css attribute list-style-type. So all we need to do is create a style class on the page inside head tags, and then apply this class to the two lists.

Page:

<apex:page showHeader="false" controller="LetterListController" standardStylesheets="false" sidebar="false" renderas="PDF">

<head>
<style>
.letterList{
list-style-type: lower-alpha;
}
</style>
</head>


<apex:dataList value="{!accounts}" var="account" id="theList" styleClass="letterList">
<apex:outputText value="{!account.name}"/>
</apex:dataList>

<ol class="letterList" type="a">
<li>First Item</li>
<li>Second Item</li>
<li>Third Item</li>
<li>Last Item</li>
</ol>

</apex:page>

The output PDF is now -


Tuesday, 29 June 2010

"Chatter-Bot" scoops grand prize in Chatter Developer Challenge

The Salesforce Chatter Developer challenge has ended and the winner has been announced as Chatter Bot by Michael Leach. Chatter Bot is a project that enables the transfer of real world physical sensor data to the Salesforce cloud in the form of Chatter.The Chatter Bot has it's very own personal profile within Chatter, and updates subscribers of significant readings from light and motion sensors.

The following video shows Chatter Bot in action


What impresses me most about this idea is that it really plays on Chatters aim of making information more personable and efficient. Using sensors in this context may get scientists and security organisations thinking about how they could make effective use of combining sensor input with cloud technology.

A Chatter adaptation for the Android mobile phone platform developed by Jeff Douglas came second in the competition. Third place was shared by three separate projects; Location Glimpse; a location sharing application, Txt2Chatter; a text message service that allows users to remotely update their status, and Feed Sentiment; providing managers with an overview of how the sales team is feeling about current opportunities.

Wednesday, 26 May 2010

An Introduction

I am currently working on creating a prototype system on the Force.com cloud computing development platform. Using cloud based technology has allowed the client I worked for to access and interact with their data directly and securely from anywhere using an internet browser, whilst improving the user experience significantly with an interactive graphical user interface over a standard "green screen" approach.

While working with this technology, I have found that the best insight and practical advice on using the platform actually comes from personal blogs. With this in mind, the purpose of this blog is to publish my own hints, tips and experiences using the Force.com platform and also report on and provide links to the latest emerging cloud computing technology.

Please bookmark this blog and keep in touch. Enjoy!

As a final note, I would like to thank Jason Venable and Jeff Douglas for their blogs, which have provided helpful solutions and techniques to employ while using the force.